

Last year I created a project that consisted in a series of hand-lettered letters. Then I took the letters I had originally drawn by hand, vectored them in illustrator and used the Blend Tool to create a 3D look. I actually learned this technique from hand-lettering artist Ian Barnard. I started posting the process videos from this Alphabet series on Instagram and I’ve had an incredible response to them. Many people have been sending me messages to ask how I created the letters and asking me to teach them how to do it as well. In this post I’ll show you the step by step process on how to achieve the same look.
Note: This post contains affiliate links, which means if you happen to purchase something, I’ll make a small commission at no extra cost to you! See my full disclosure here.
What You’ll Need to Create Your Own 3D Letter
For this tutorial, you’ll need to have access to Adobe Illustrator. You can get a free trial or you can buy the app from the Adobe website.
Step One – Create the letter
The first thing you need to do is create the letter. I drew every letter on paper and then scanned it at a high resolution and placed it in Illustrator. However, if you prefer to work digitally, that’s fine too. Whether you choose to work on paper or digitally, remember to make a monoline letter.
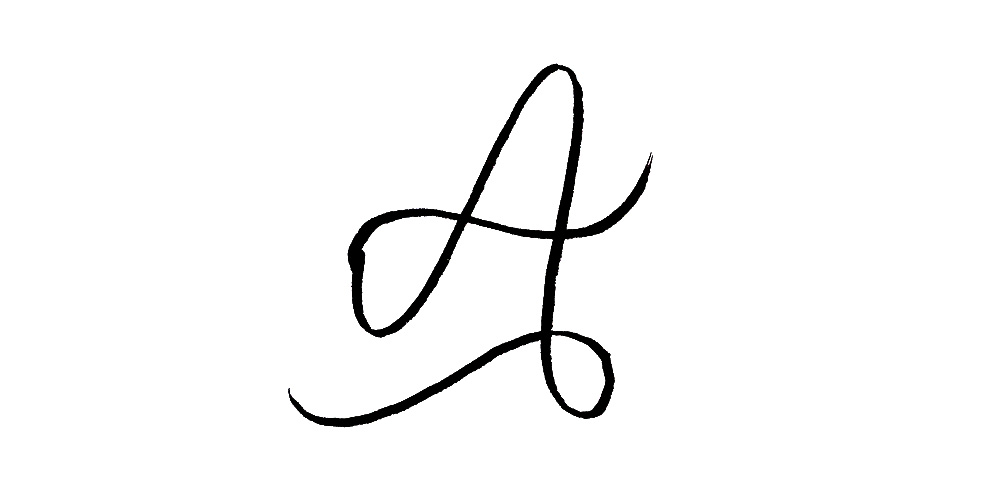
Step Two – Vectorize your letter
For this effect to work, you need to have a vectored monoline letter. Use the Pen Tool (P) to trace your drawing as a Stroke path.
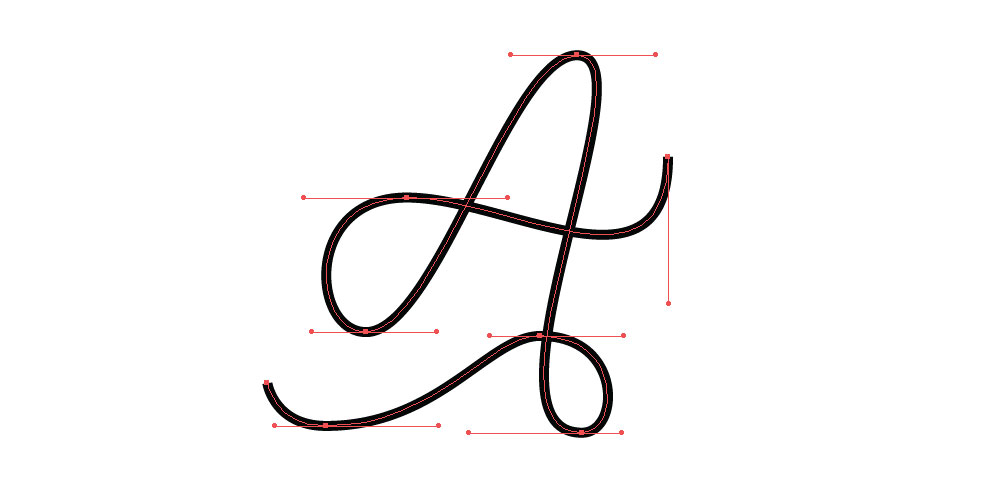
Step Three – Creating the gradient
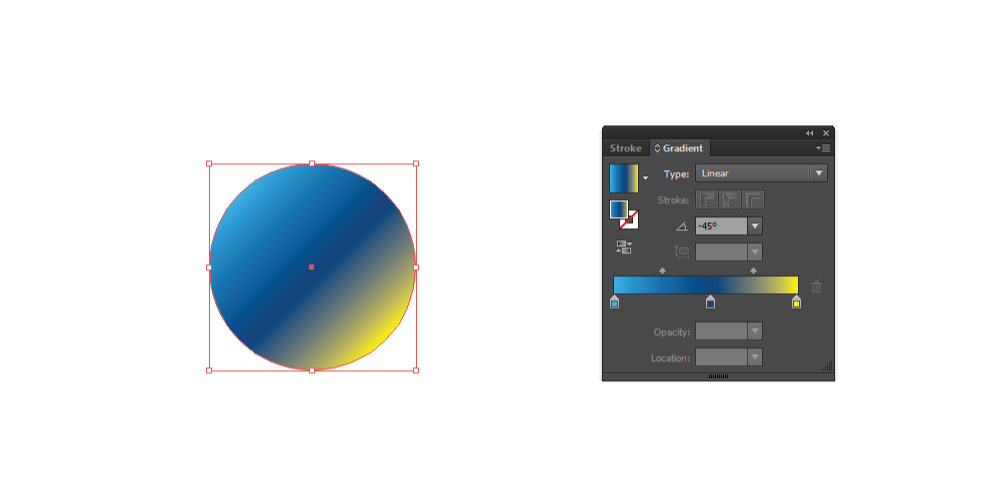
With the Elipse Tool (L), create a circle and fill it with a 3-color gradient. Open the Gradient tab (Window > Gradient) and change the colors to your liking. The gradient needs to be Linear and the angle has to be at a -45º degree or something close to that.
Step Four – Creating the 3D look
Now this is where the magic happens! For the 3D look to work, you need to duplicate the circle you just created. Keep duplicating until you have 15 circles.

Go to Object > Blend > Blend Options, change the Spacing to Specified Steps. I always set it to ‘1000’ because it’s the maximum that Illustrator allows and it gives you a very smooth transition. Select all the circles and go to Object > Blend > Make. You will see that Illustrator creates a new object with the Blend.

Select the new object and your outline letter (hold Shift to select both of them). Now go to Object > Blend > Replace Spine.

The Final Touches
You will see that there are a few ‘mistakes’. For some reason, a few circles keep showing up on the letter. To fix that, take the Direct Selection Tool (A), select each circle individually and delete them.
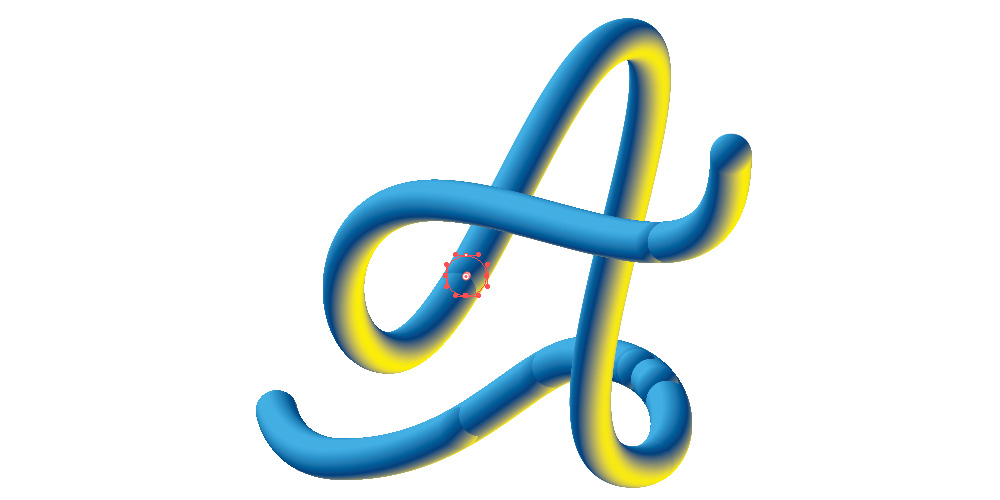
Do this for every circle still showing up on the letter until you can’t see the circles anymore.
You’re Done
There you go: you have your final 3D looking letter!

You can use this technique for other things as well: you can create words and phrases – the possibilities are endless. You just have to be creative and use your mind to create whatever you want.
I hope this tutorial was helpful but if you have any questions, don’t hesitate to comment or contact me! I will do my best to answer your question. And if you create something using this tutorial, make sure to tag me on Instagram so I can see it!
BONUS
If you would like to see how I created my Alphabet series, I’ve uploaded every process video on my Youtube channel. Don’t forget to subscribe and check out the playlist with all videos below!






13 Comments
Such an awesome technique and so simple. Thank you for sharing!
Aaron, I’m so glad you like it! Thank you so much for checking out this tutorial!
Hey I can’t use the Replace Spine tool, do you have any idea why ? Did exactly the same steps than you 🙂
Hi Maximilian,
Are you using it with a Stroke path? Did you select both the path and the blended object? Is Illustrator giving you any errors?
Found the problem, i was using a Path I created for another Projekt and it was already used with the blend tool and that didn´t work 🙂 but thank you a lot.
Ooh! I see. In that case, you would need to release the blend you used before. Go to Object > Blend > Release (if you’re on a Windows, the shortcut is: Alt + Shift + Ctrl + B).
Worked well
I’m glad you made it work! 🙂
This tutorial saved my life.
Very Nice Explanation. Creative Typography. Thanks for sharing.
Thank YOU for checking out my tutorial! 🙂
Thank you for the tutorial! it turns out beautiful.
my only question- how did you get the outlines (edges) of the letter to be smooth?
You’re welcome and thanks!! I’m glad you like it.
I traced the letters with the pen tool in Illustrator – that’s why they’re smooth. If you watch the videos I added at the end of the post you can see my entire process. You can slow the video down since it’s a speed up video, so you can see my steps better!